DIY Gift Box
So here we go folks....my first blog post....ever. It's taken me a while to actually get around to hitting the "publish" button. I'm in no way a tech-savvy person whatsoever. So after feelings of frustration and defeat, asking God and my honey for forgiveness for my attitude, and taking a breather, I am FINALLY posting to blogland! Woohoo!
At the beginning of the school year, I was trying to think of something cute for our kiddos' teachers...something that would help to start the year off right. And this gift box is what I came up with.
First, please excuse the cell-phone pic quality. (Since my birthday is just around the corner, I'm hoping my wonderful hubby will take into consideration that I seriously am in need of a nice Canon Rebel...ehem.)
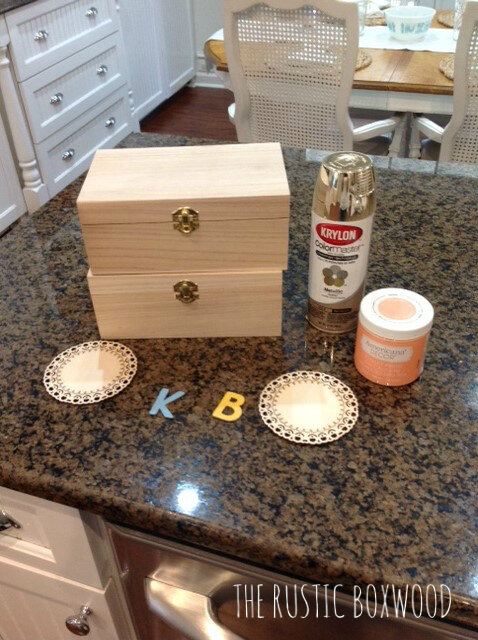
What you'll need:
wooden box
quality metallic gold spray paint (My fave is Krylon Colormaster.)
chalk paint (I used Americana.)
chip board initials
wooden medallion
foam brush
glue dots
pretty scrapbook paper
scissors
screw driver (optional)
First, if you can, use your screw driver to take off the hardware so that you don't accidentally paint your hardware.
Next, use your foam brush to paint the box with your chalk paint. Use thin layers, and continue to smooth out any excess paint. It dries quickly! Oh, and be sure to leave your box open while it dries. Otherwise, well, we all know what happens if you forget....
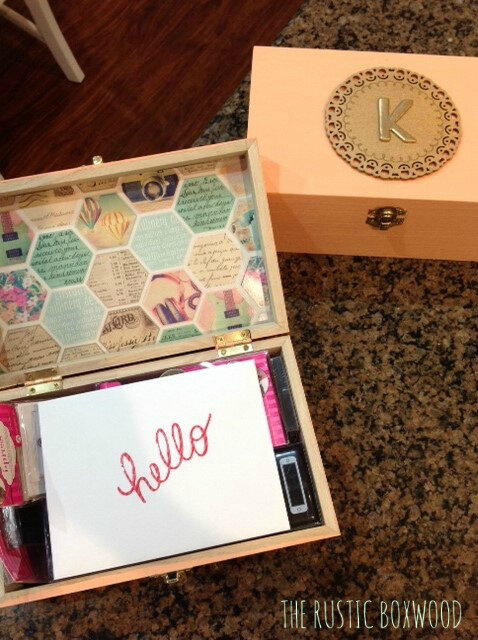
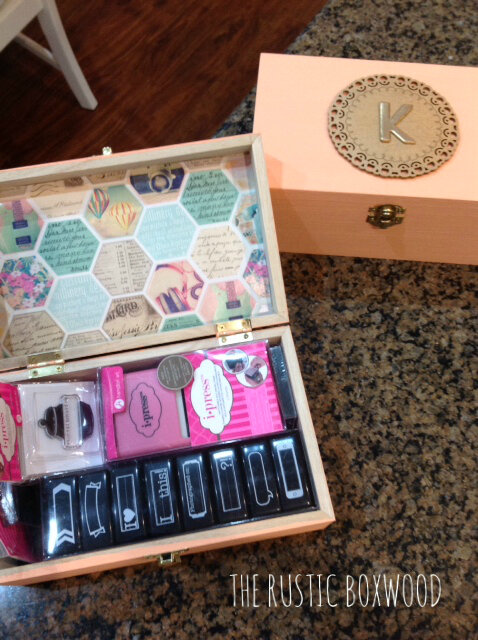
Third, use glue dots to adhere your chip board letter to the medallion, and then spray paint your newly customized decorative piece. After that's dry (which is fairly quickly), use more glue dots to adhere the medallion to your beautiful box.

Fourth, after you've screwed your hardware back in place, take a step back and admire your gorgeous piece of work. So exciting! We're almost finished!
Fifth, you'll want to line the inside of your box with some really fun paper (e.g., a striped, polka-dot, or floral pattern, or simply a complimentary color to your chalk paint). Trim to fit inside, and then after attaching more glue dots (aren't they wonderful?!) to the back of your paper, adhere it to the inside of your box.

How fun and cute is that?! So easy, and so quick! You can also add some colorful/patterned ribbon to embellish it even more.
To add a little more to this conversation piece, I stuck a few stamp sets that I purchased on clearance at my local crafts store and a little "Hello" note from my kiddos.

And there are also other ways to use this idea....A blogger friend of mine actually painted hers a beautiful white, attached a spray-painted medallion on the front (after removing the hardware) and used it as a decorative accessory on top of books! So simple, yet it packs a powerful punch!
What do you think about this simple diy project? How would you paint your box, and in what ways would you use yours? I'd love to hear from you! Comment below, or stop by and say hey on Pinterest, Instagram, Twitter, HomeTalk and Facebook. It always makes my day to hear from my sweet readers!
You might also like: