DIY Chalkboard
Hello friends! Thanks for stopping by! Today, I wanted to share with you a quick and easy project that costs very little, yet packs a powerful punch in your decor! But before we begin, I wanted to remind you to follow along with me on Pinterest, Instagram, Twitter, HomeTalk and Facebook, so you don't miss another post!
Let's get started!
What you'll need:
chalkboard paint (located in the paint section at Walmart, Home Depot, etc.)
foam sponge with wooden handle
paper plate
painter's tape
frame with glass
My diy chalkboard started out like this....
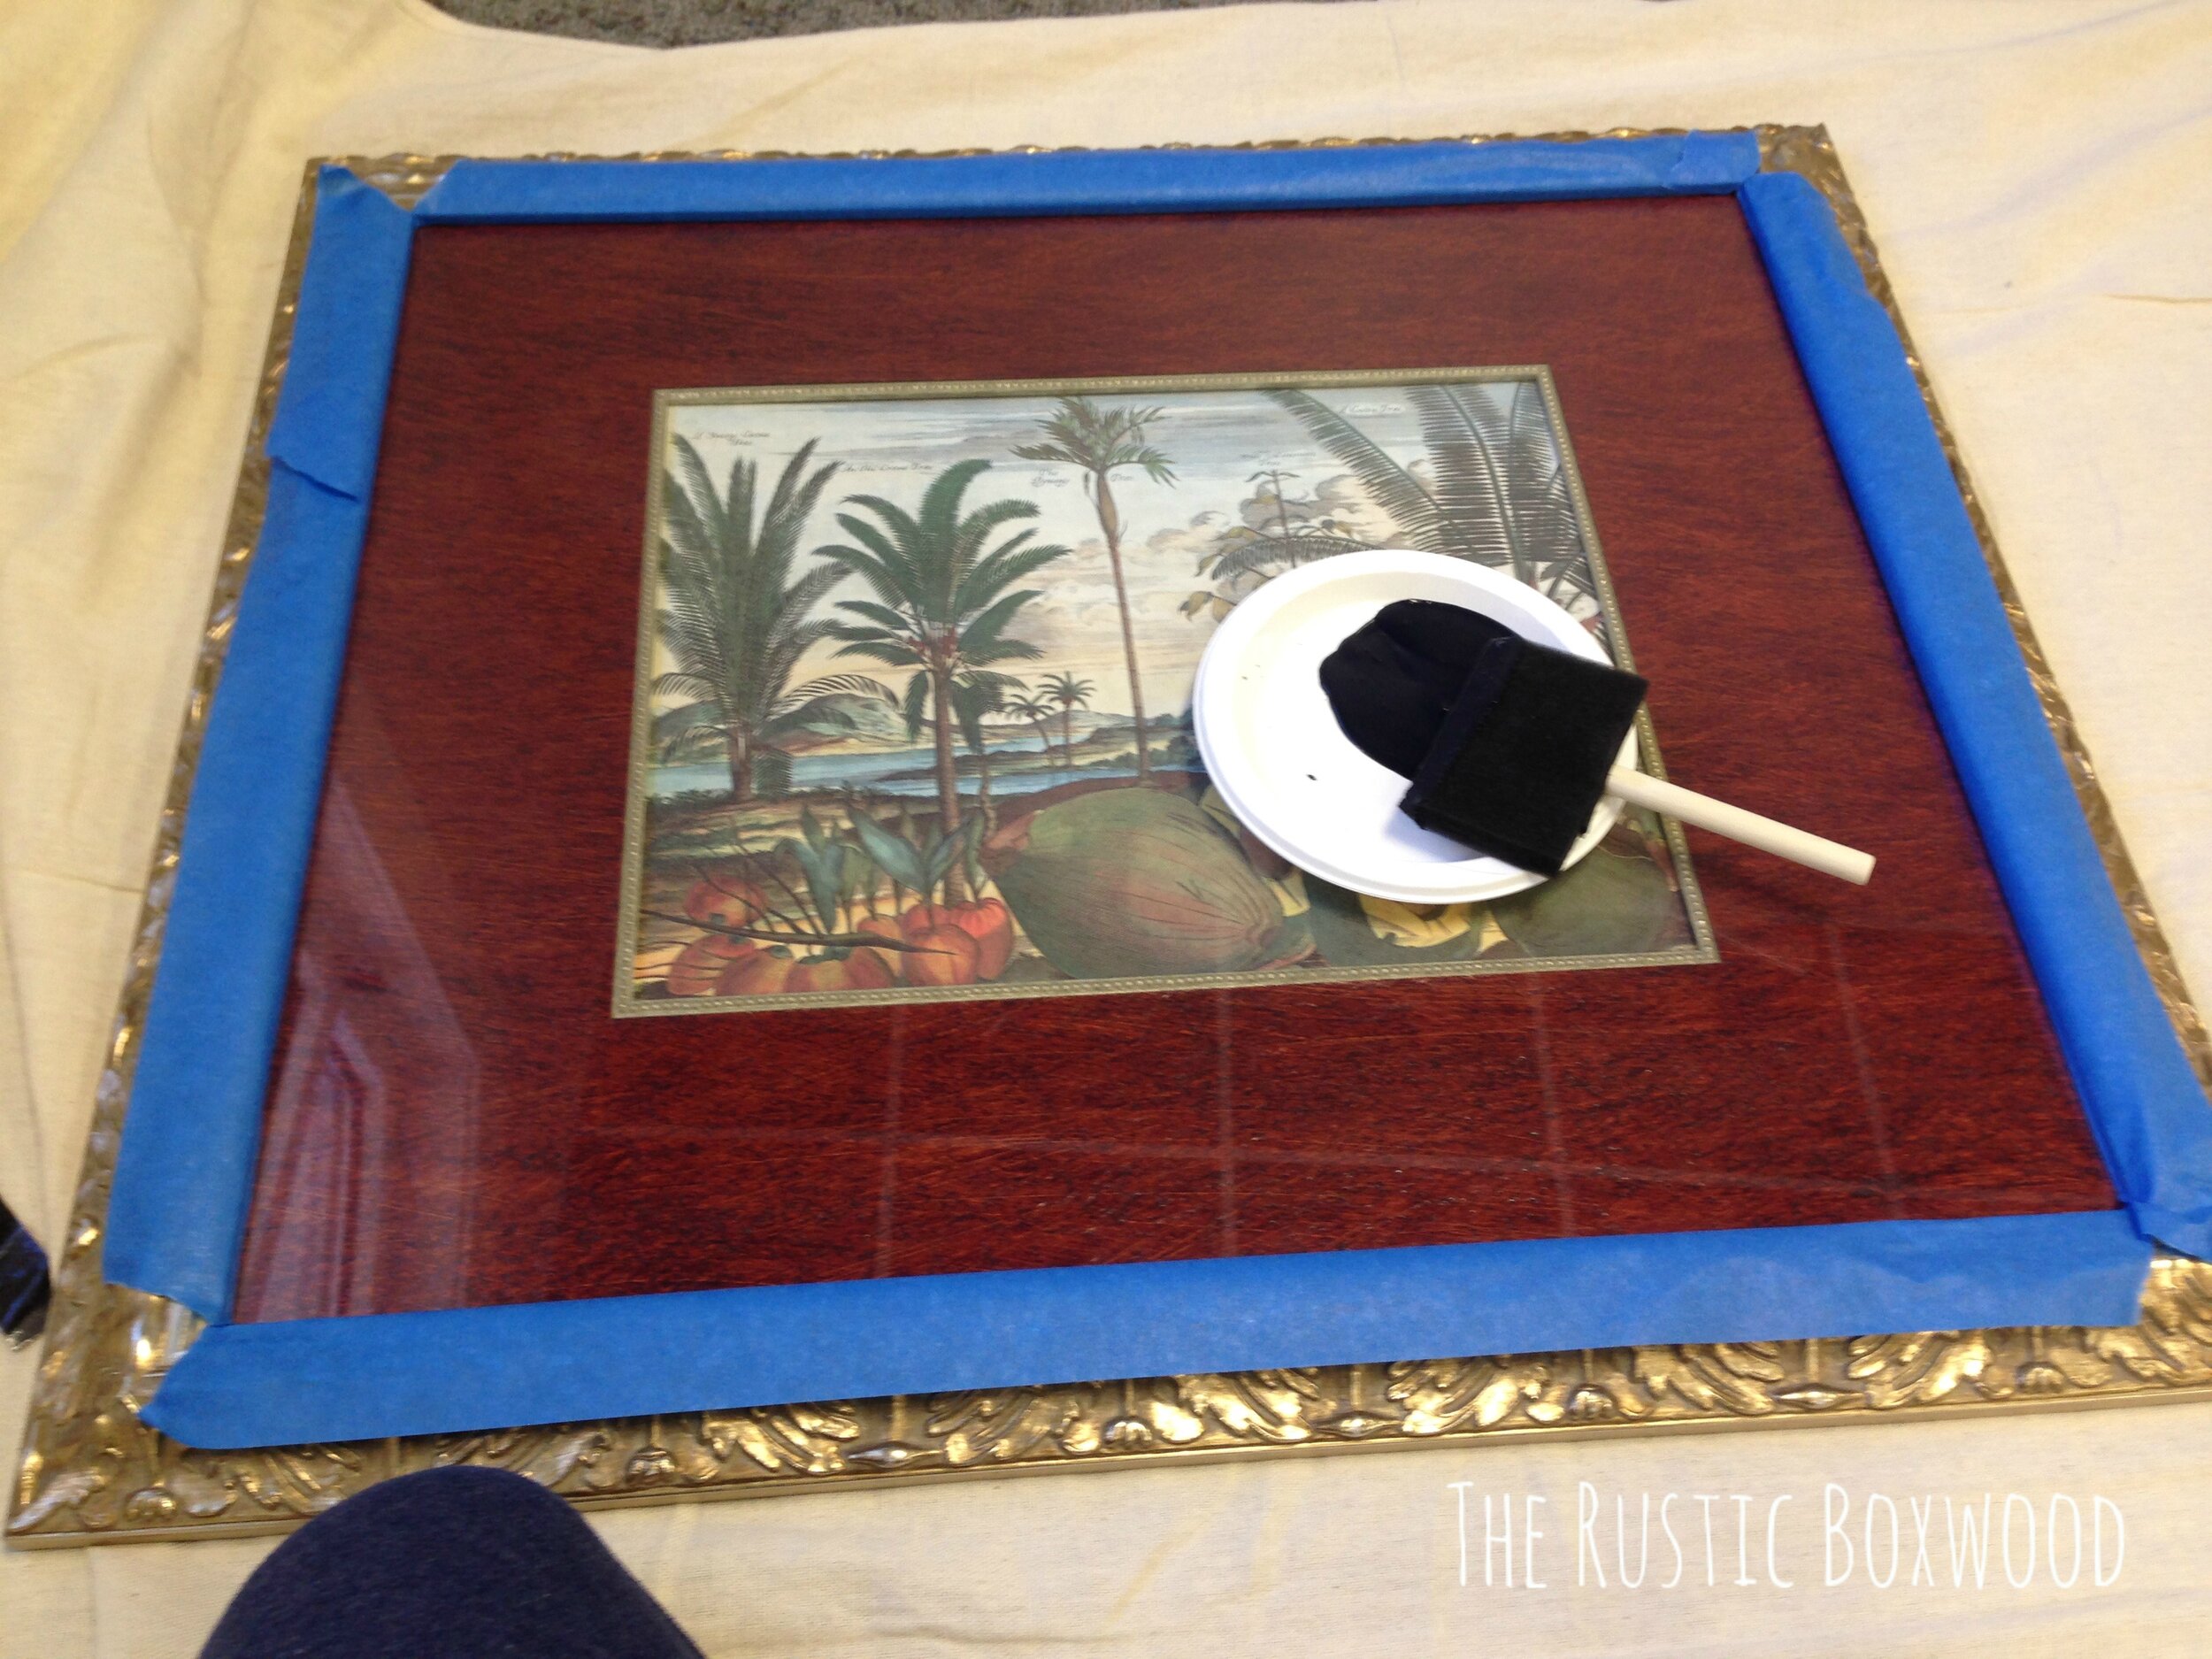
The print's pretty ugly, huh?! It definitely needed to be covered!
First, tape up the edges of your frame, and make sure there are no unsealed edges! You don't want that black paint dripping onto your frame. You could always chip it off later if you needed to, but that's an added step that you just don't want to have to do! :)
Next, with your sponge in hand and paint poured onto your plate, gently paint the chalk paint across the glass, making sure to spread it evenly. Once your glass is covered, let it dry for about an hour before applying your next coat. If not, as you paint the second coat, some of the paint will come up. You don't want that! :)
Third, after you've completely covered the glass with chalk paint, gently pull the painter's tape off. (Don't "rip" it off, or you'll end up pulling some of the chalk paint off as well! Trust me, I know! Lol!)
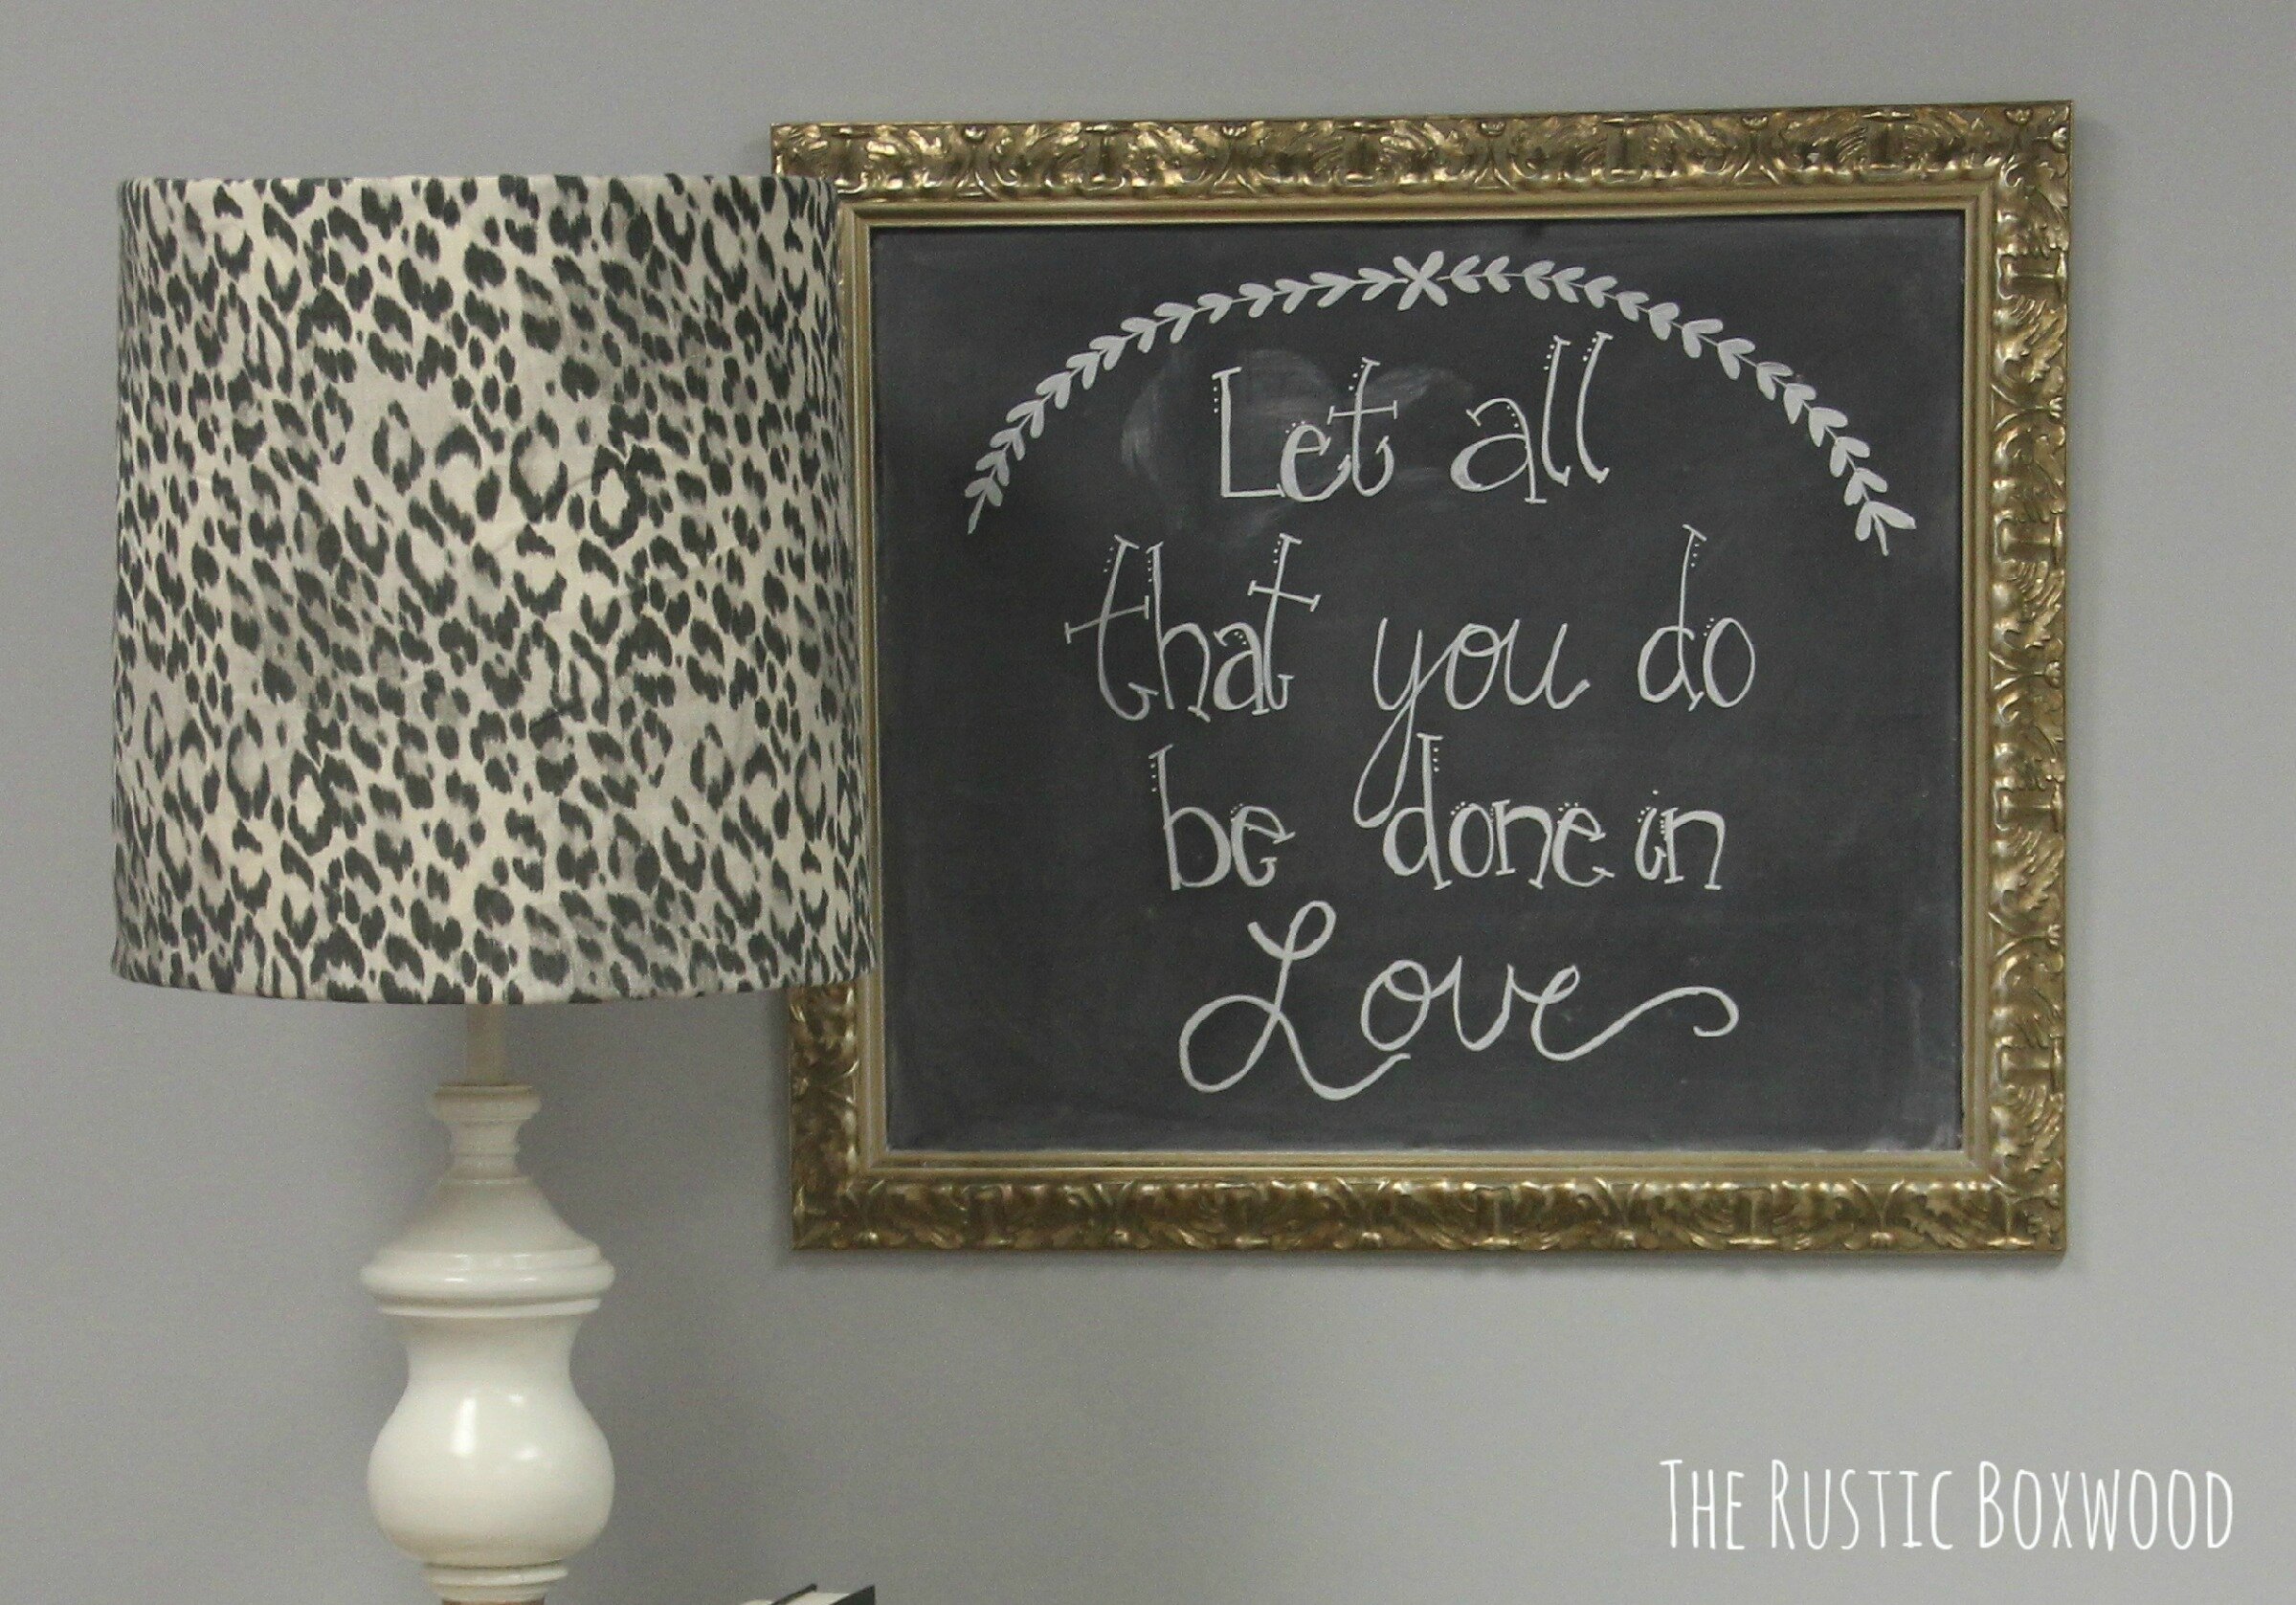
Finally, you'll want to "season" your newly-painted chalkboard with chalk! How to season: take a piece of chalk, turn it on its side, and rub the chalk back and forth AND up and down on the board, covering the glass completely. (If not, you'll NEVER be able to fully erase what you've written on your board!) Wipe with a soft rag or paper towel, and then blow off any excess. Now, it's ready to be used!! You can add your favorite scripture, or google "chalk art" and find all sorts of inspiring ideas! In addition to the diy scripture below, here's another one that I did (source included). Or, if you don't want to do any art, you can always simply hang a pretty wreathe in the middle!
Here's what the finished product looks like now in our Sunday school room...
That's it! This project is very easy, and I think every home owner needs at least a couple of chalkboards in their home! This decor is such an inexpensive upgrade and makes a beautiful statement!
Also, on another note, did you happen to notice the lamp and shade in the above pic? That's actually a thrifted lamp, and it received a major overhaul! If you'd like to read all about that diy project, the easy tutorial on recovering a lamp shade can be found here, and the how-to on spray-painting a lamp can be found here.
Thanks for stopping by! If you have any questions at all, please feel free to comment below, or stop by Pinterest, Instagram, Twitter, HomeTalk and Facebook and say hey. It always makes my day to hear from my sweet readers!