
VINTAGE SPICE RACK MAKEOVER
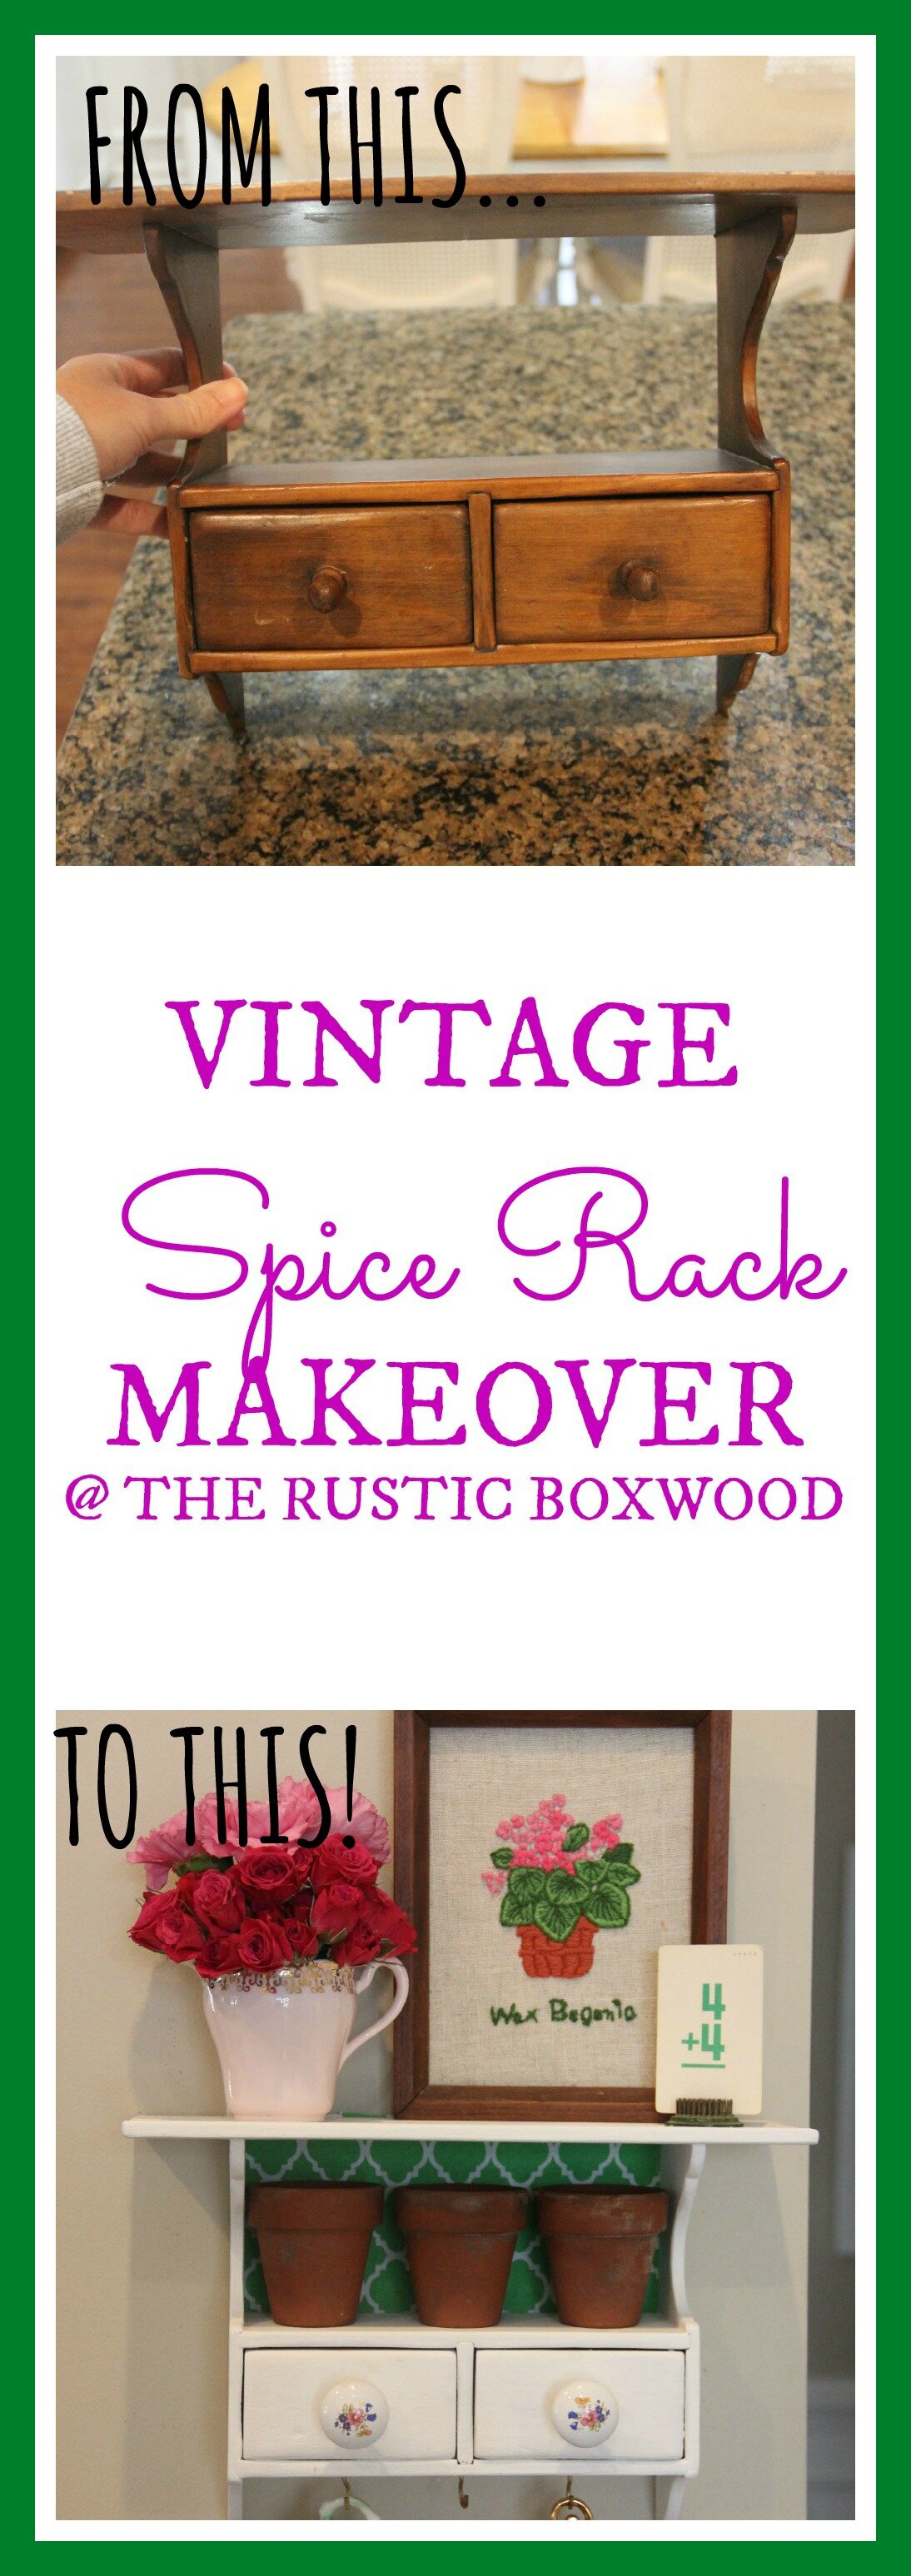
Hey y'all, and thanks for stopping by. Today, I wanted to share with you about this lovely spice rack makeover!
I don't see this size too often, so when I eyed it in the thrift store last week, I knew exactly what needed to be done! Some fresh paint, new knobs, and gold hooks were the answer! It was pretty bland, but the bones were great...solid wood and handmade (and hand-stamped!) here in the good ole' USA. Can't get much better than that!
Here's what I used to give new life to this piece:
chalk paint (found here or at Michael's)
chalk paint wax sealer (found here or at Michael's)
mini paint roller
foam sponge (found here or at Michael's)
paper plate
gold hooks
scrap fabric
knobs
gorilla glue (found here)
3M hooks (found here)
This project was so easy. And with some fun tunes playing in the background, the time flew by quickly!
Before I begin, I want to point out that chalk paint is a wonderful product because you don't have to sand your piece of wood before painting. Let me repeat....No sanding is necessary! This paint is one of the greatest inventions in the history of mankind! (For more posts on chalk paint, you can check them out here and here.)

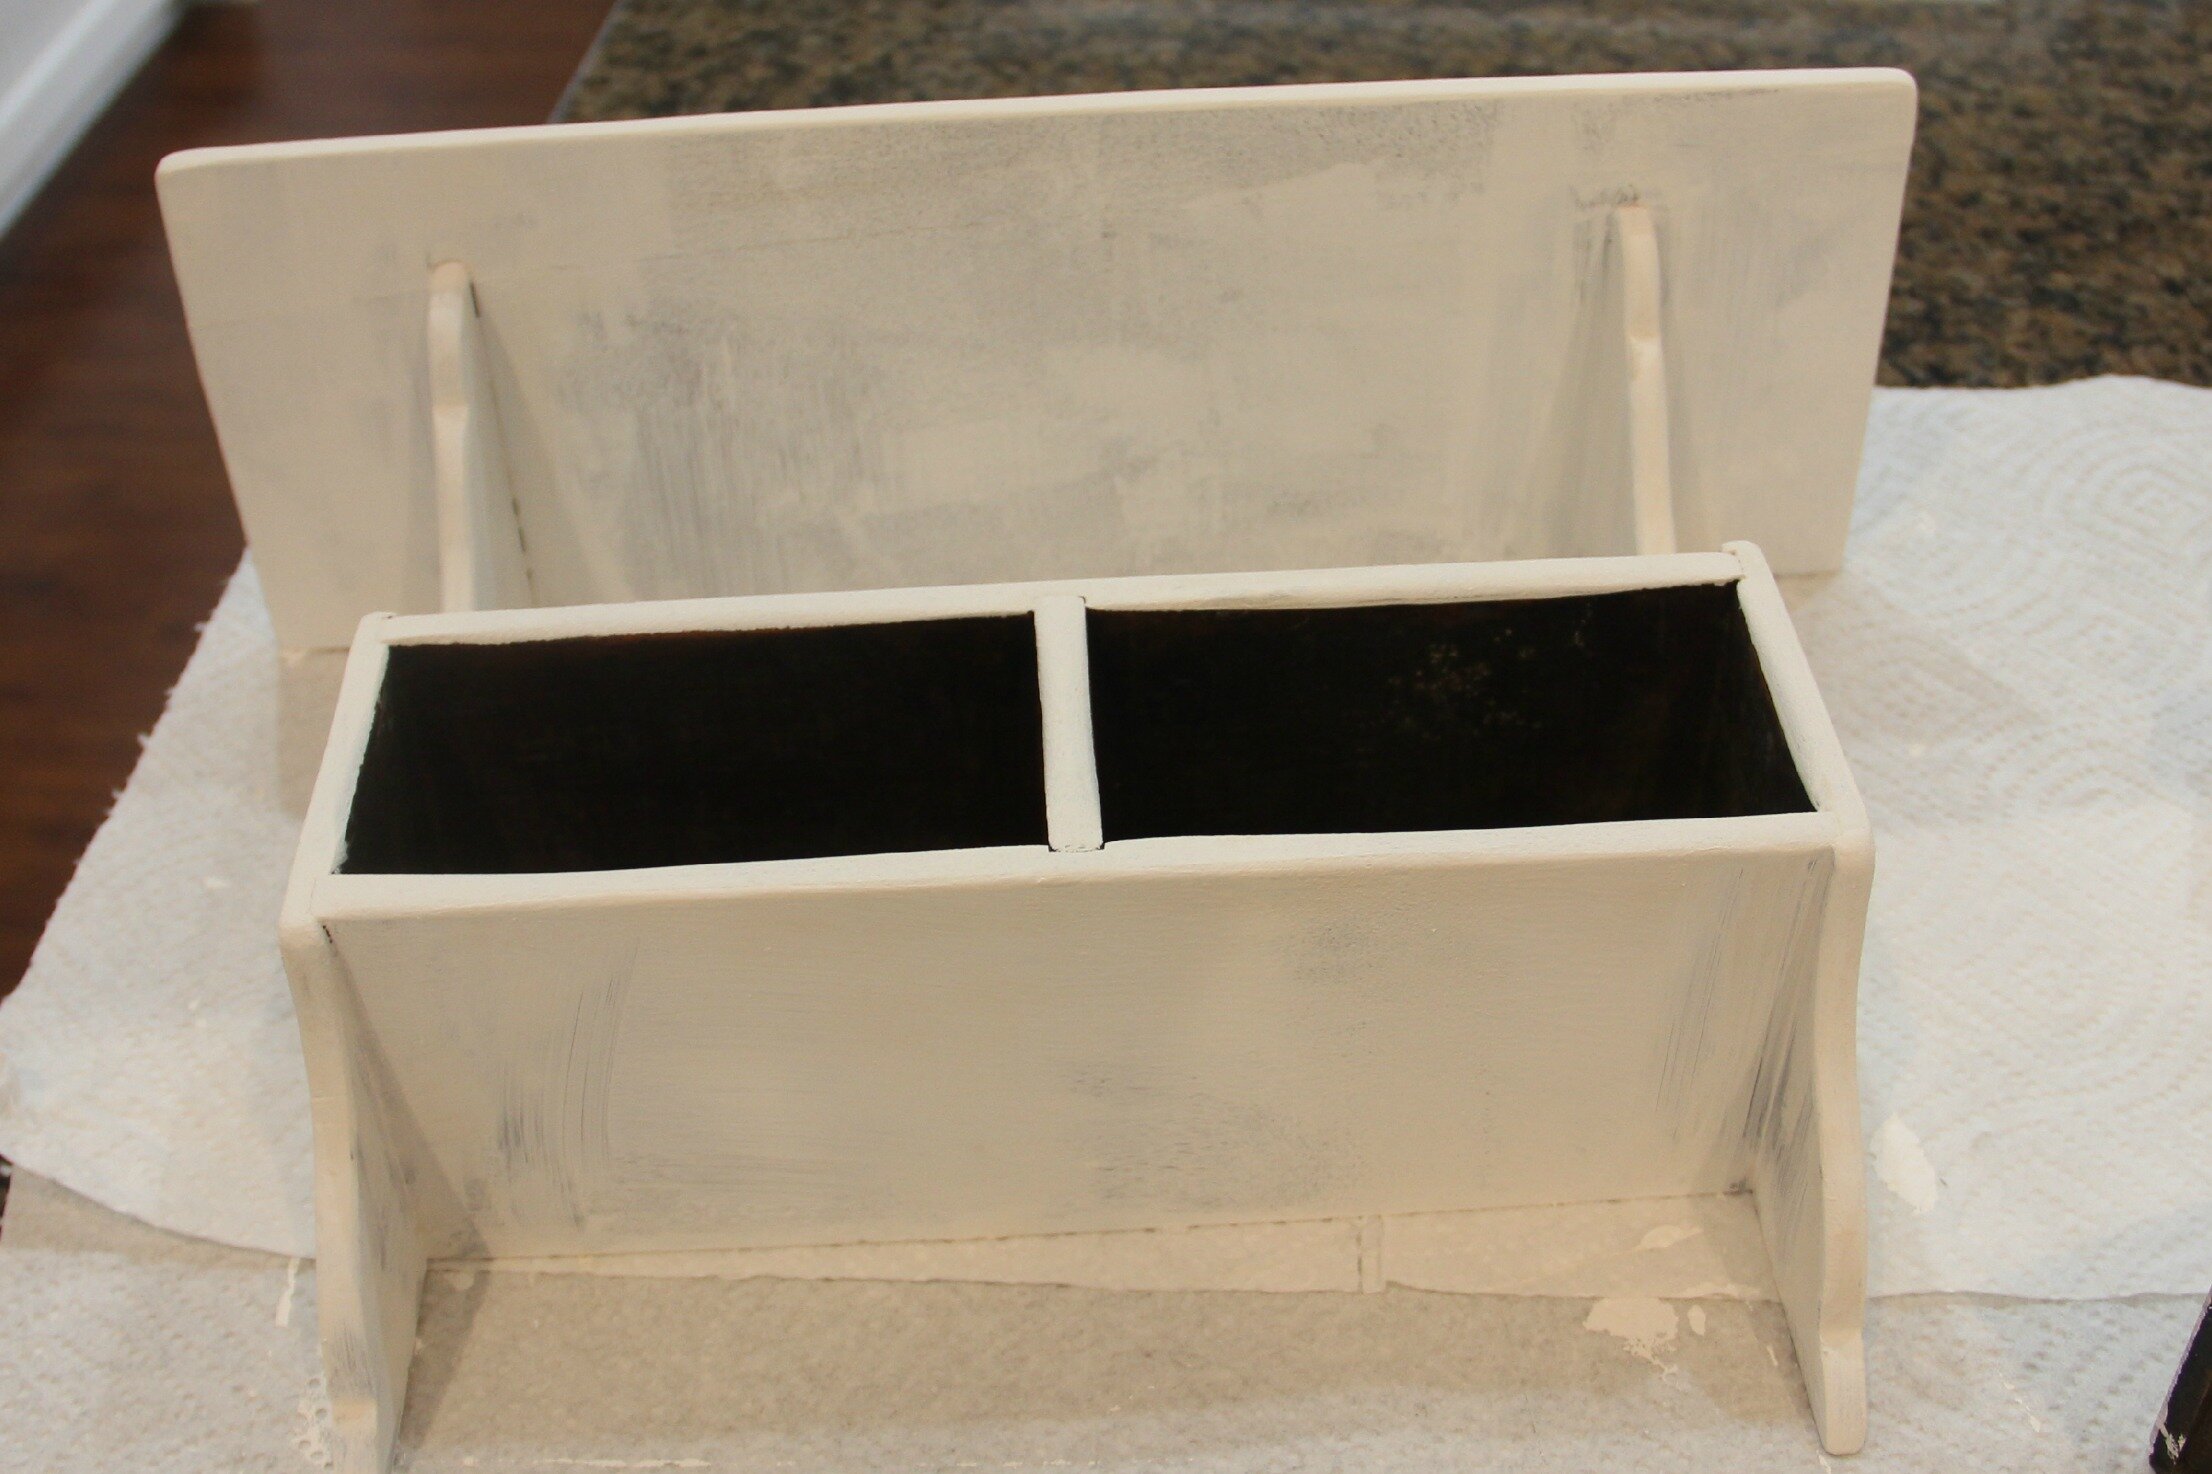
Anyway, a little something had to be repaired before painting...As you can see in the pic below, one of the drawer sides was totally disconnected. Nothing that a little Gorilla Glue couldn't fix. That stuff worked like a dream!

I started out by pouring the paint onto a plate (because who wants to clean up a paint tray when they can just throw away a plate?!). First, I used a foam sponge and painted the corners. (Always begin with painting the corners. I don't claim to be an expert by any means, but that's just what works best for me.)
Next, it was time to roll the chalk paint onto the wood. This chalk paint only required two coats of paint. (Let the paint dry about 10 minutes or so before applying the second coat.) In between coats, it'll look a little something like this...
After completing your project, you can add sealant to protect your beautifully-painted surface.
After screwing on the gold hooks and the thrift-store knobs, I taped fabric onto the back of my spice rack. It didn't need the fabric, because there was no backboard, but I really wanted to pull out more greens for the overall layout.

After completing this project, it was time to hang it. I'm not a big fan of nailing holes into the wall, simply because I change out my accessories often. So, I usually opt for 3M hooks...Aren't they another one of those fantastic inventions?!
Now for the fun part....accessorizing!
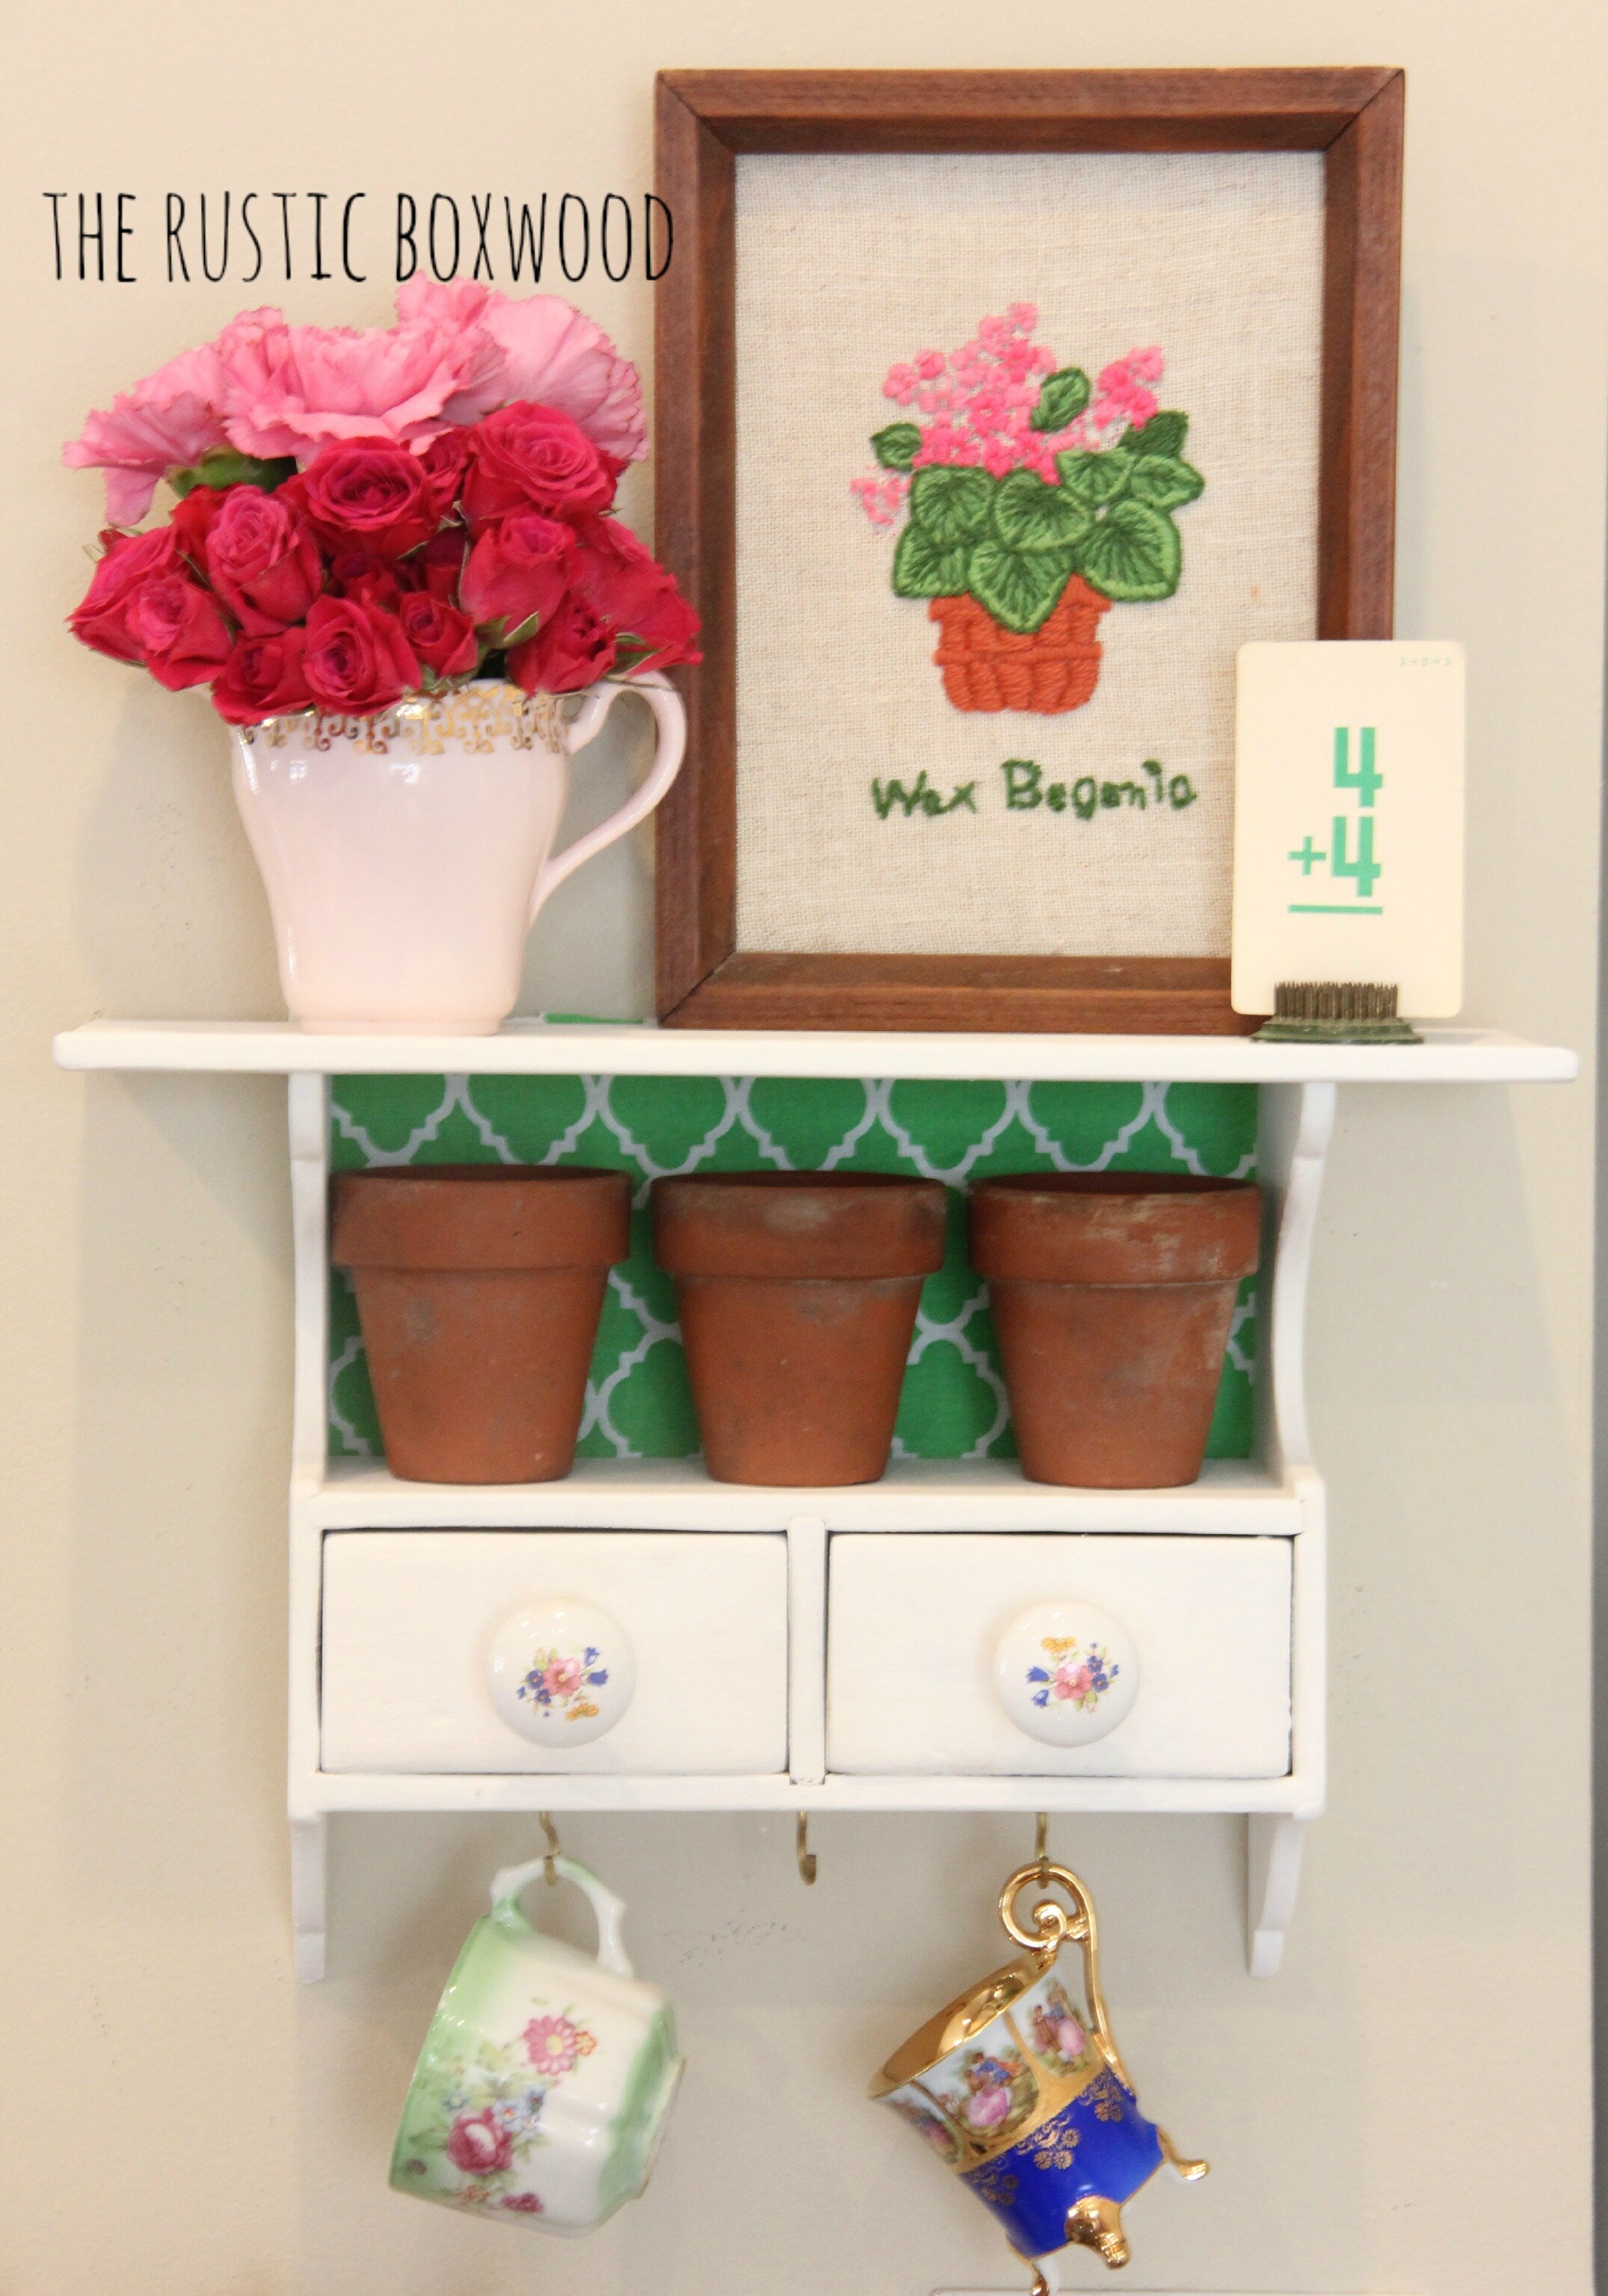
As far as choosing the color palette for this spice-rack decor, I based my decisions off of the knob colors...royal blue, pink, green and yellow. I shopped my house, looking for any accessories that would pull out those pretty colors.

The above pic shows the thrifted "Wax Begonia" hand-stitched art, the beautiful gold-rimmed pink bone china creamer, the tiny antique garden frog that holds a vintage addition flash card.
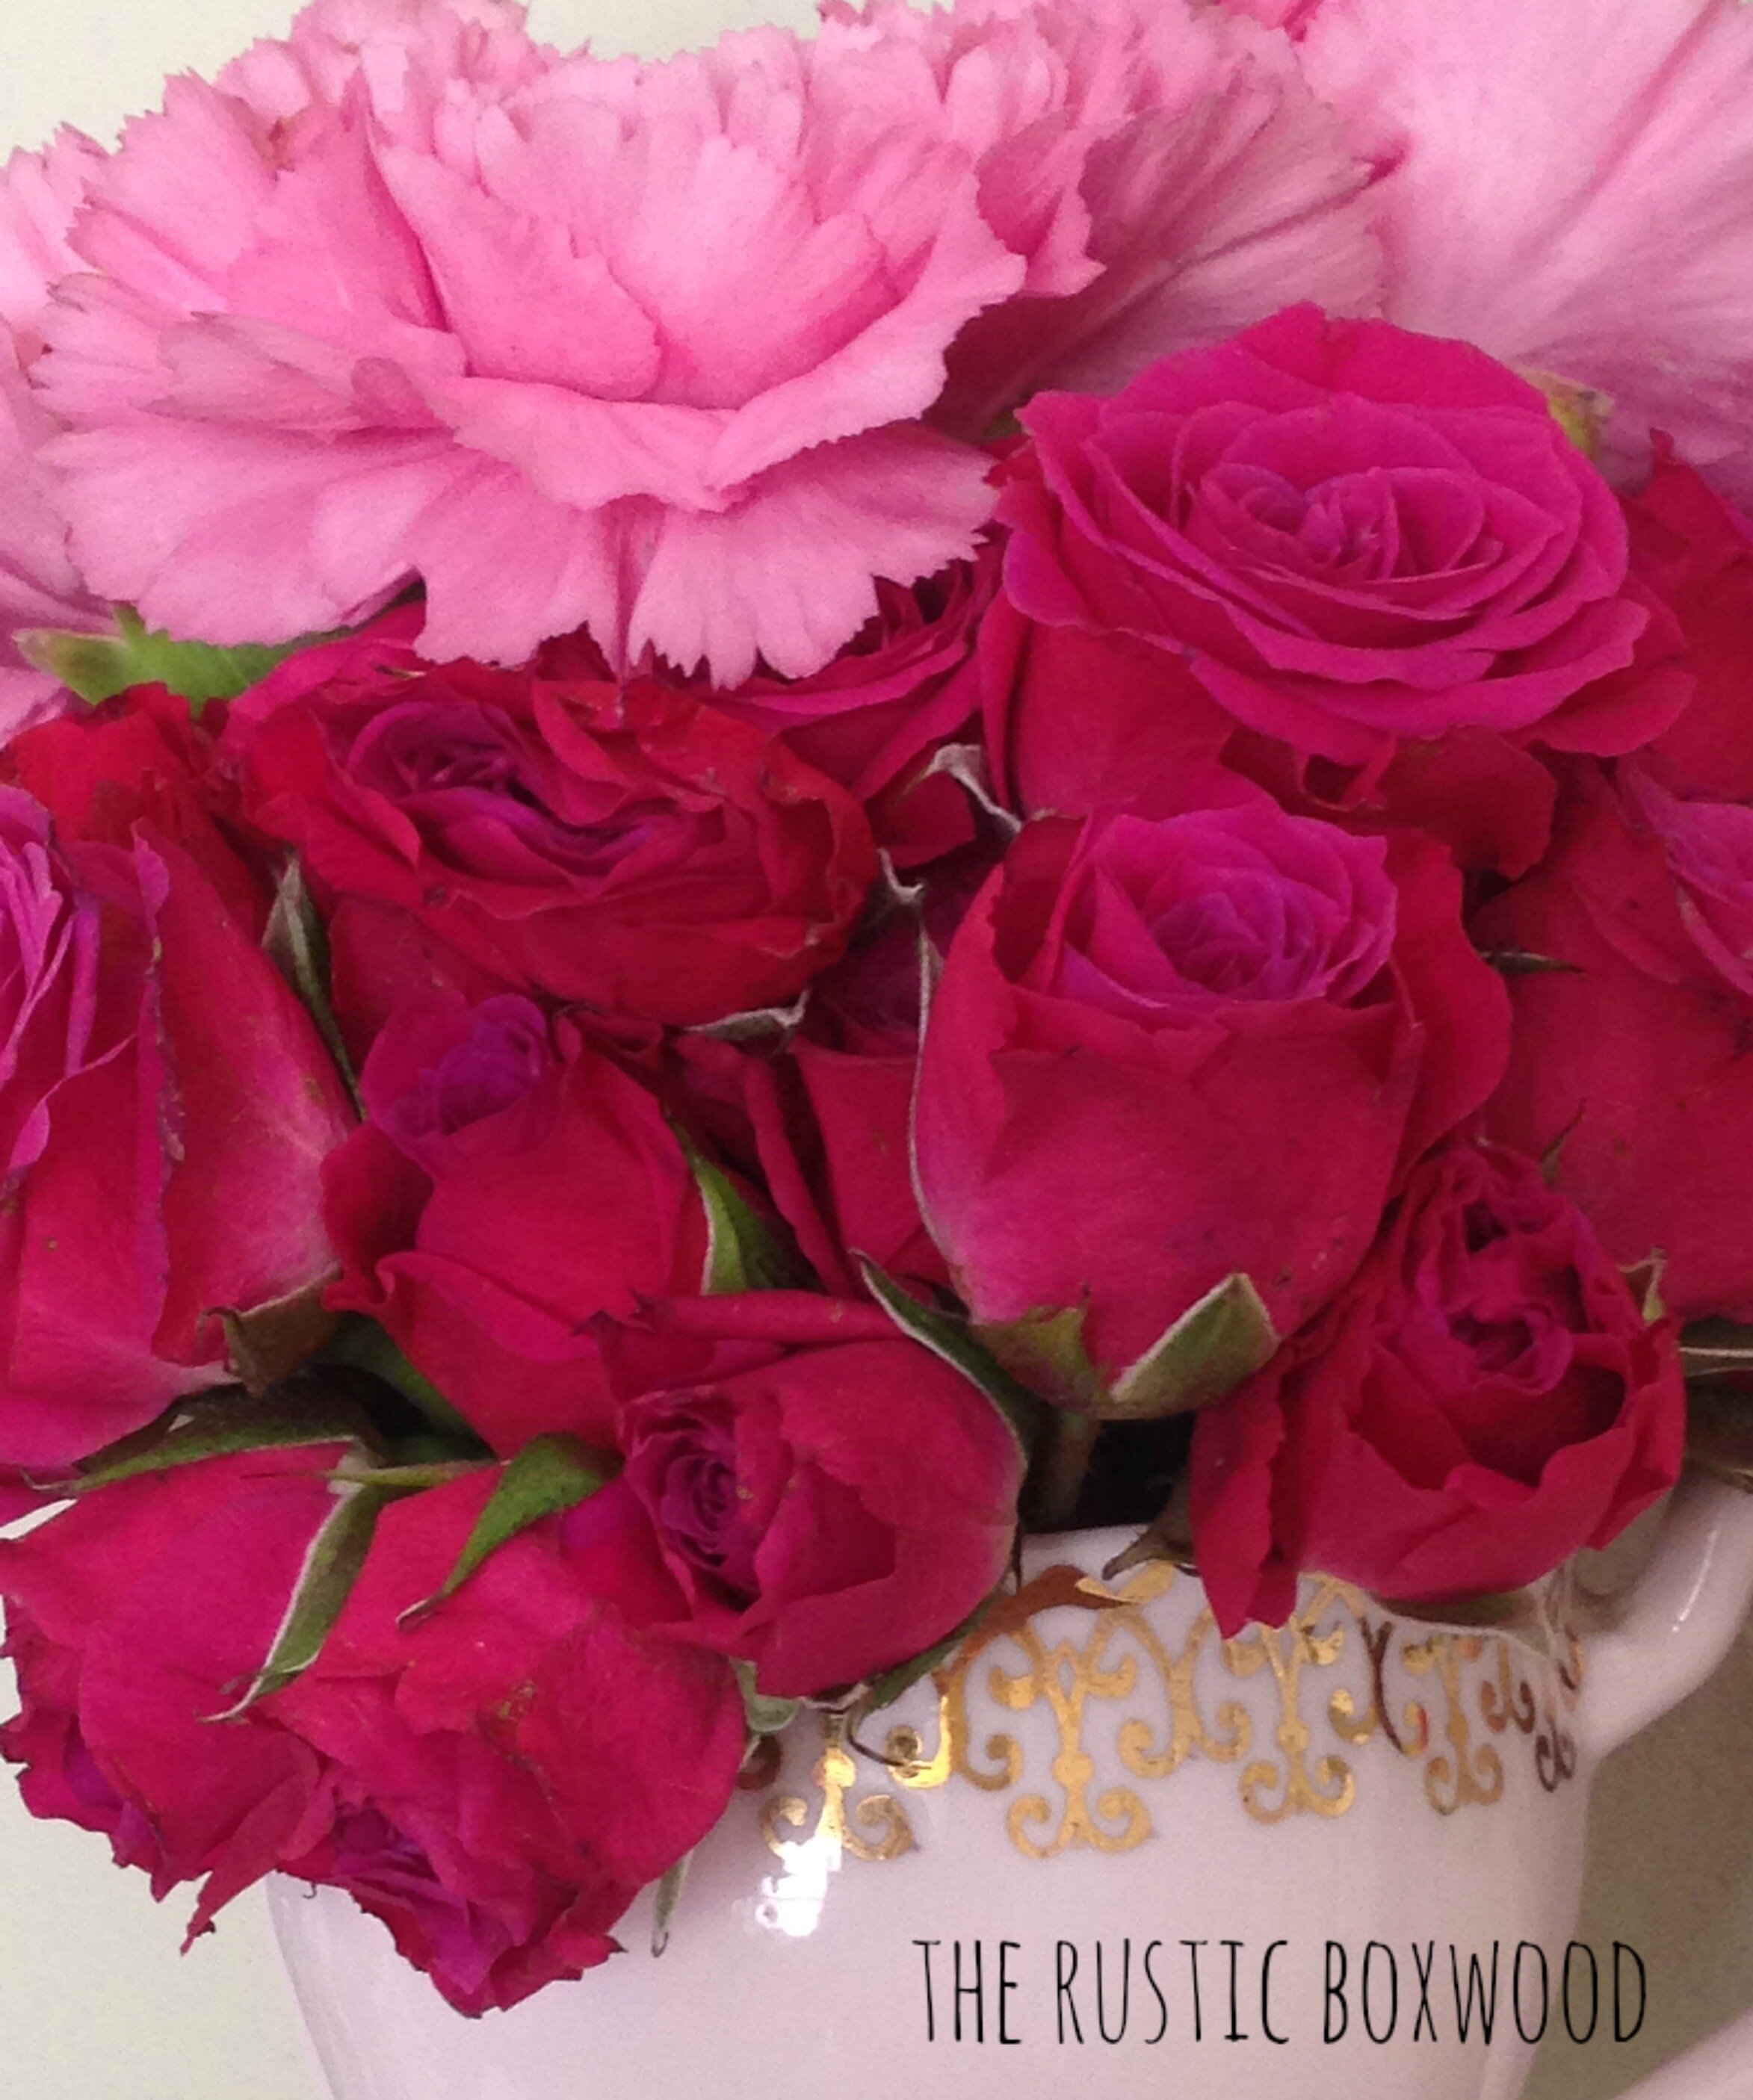
Aren't those fresh flowers beautiful in color?! I love how they pull out the pinks in this "vignette" of a spice rack. :) God's loving handiwork is displayed even in the tiniest of details.

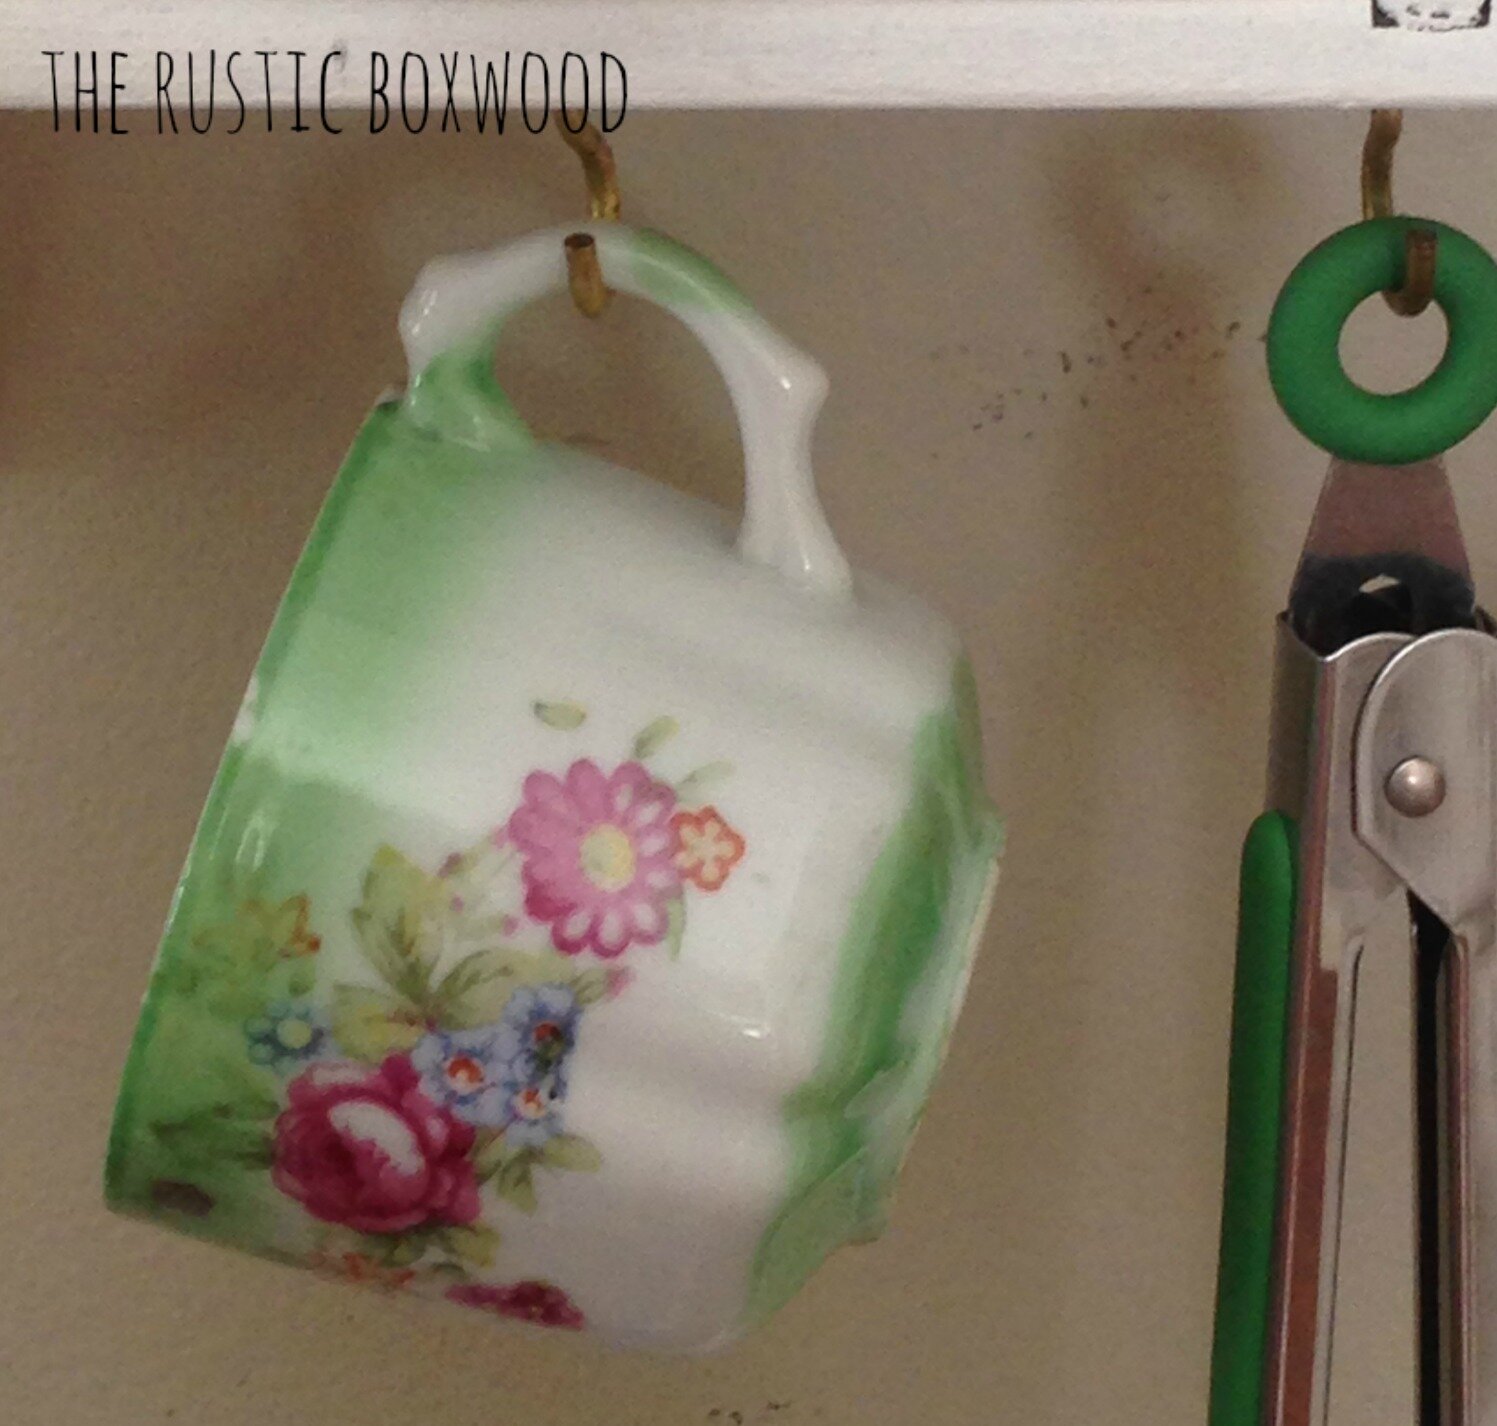
See how the fabric and the tea cup ties in with the knob so beautifully?! And look at the perfect patina on those little clay pots.

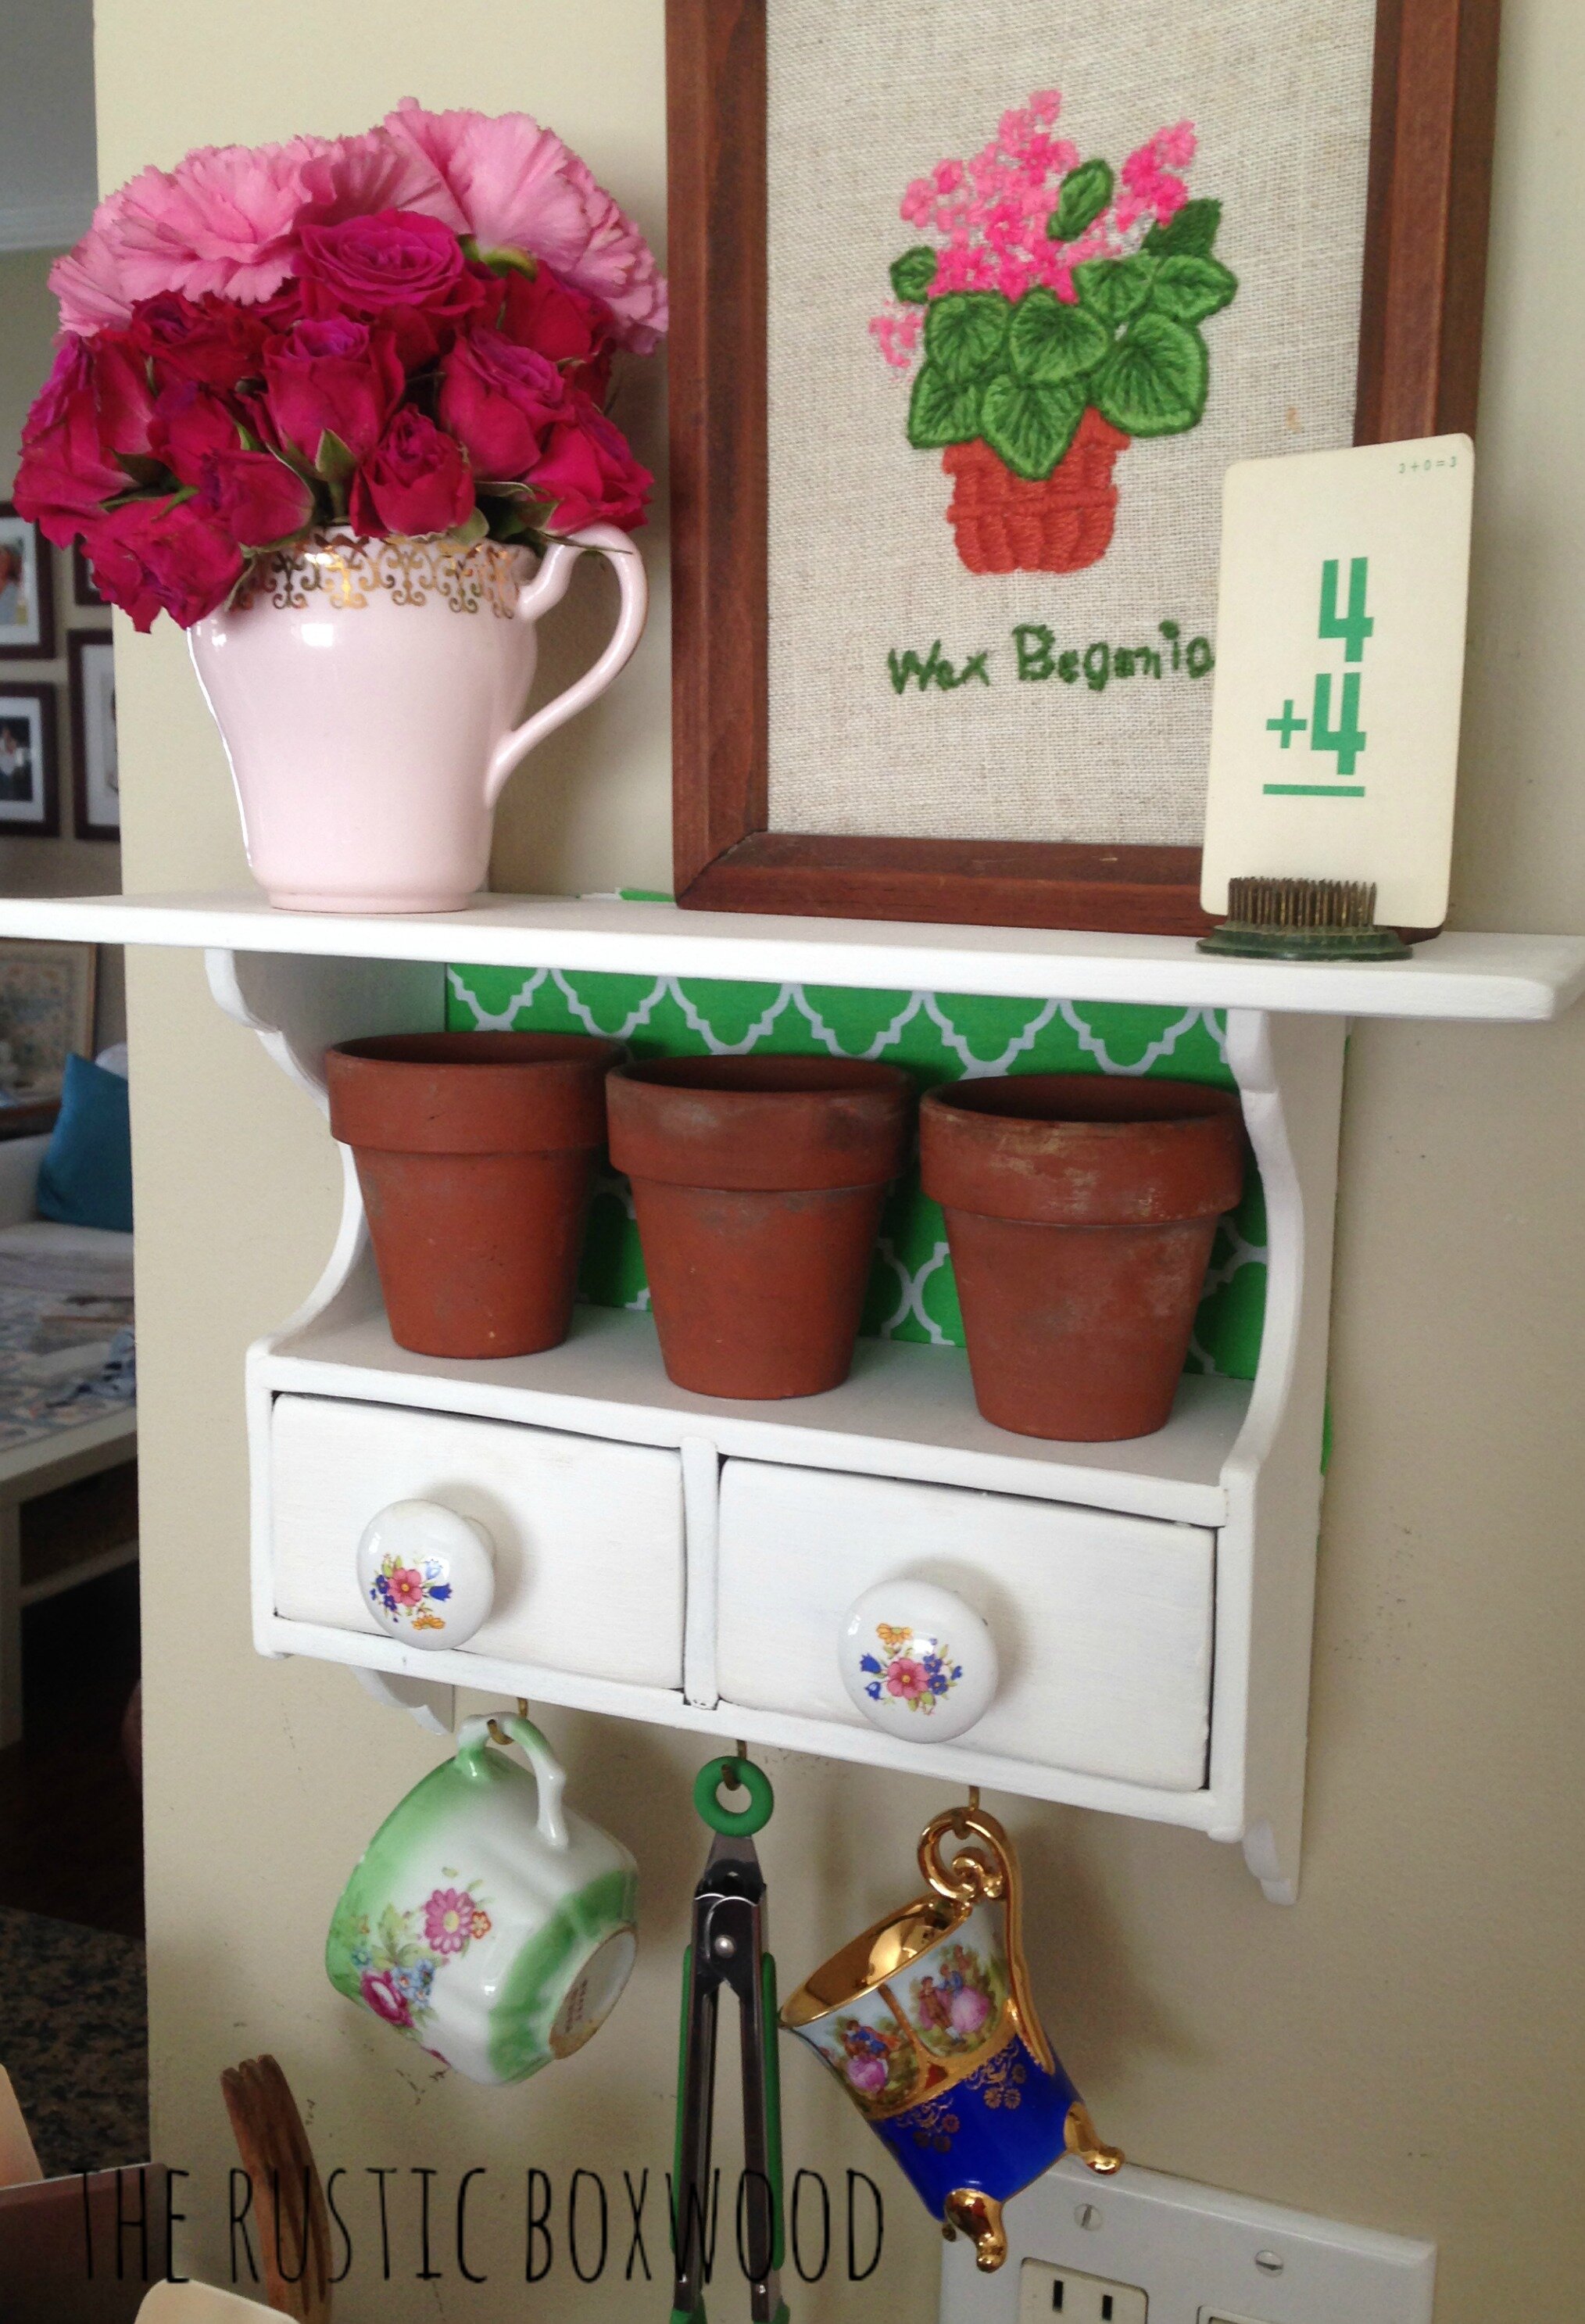
So there you have it...my newly-painted spice rack. It might not serve as a spice rack, but I love it! And that's the beauty of DIY. You can take something that's meant for one thing and use it for something totally different! Personally, this wooden rack is a piece of art, a simple way to bring more color into my home.
Thanks again for stopping by. What do you think about this spice rack? And in what ways have you added color to your home lately? I'd love to hear from you!